Sage T.
Indoor Gardening & Plant Care
Welcome to Plant Propagation: Multiply Your Greenery Indoors—Sage T. Style
If you’ve ever looked around your apartment and thought, “This place could use a little more jungle,” you’re in good company. I’ve been there—craving more green without the budget for a plant haul or the luxury of a backyard. That’s how I fell in love with indoor plant propagation. Over the years, I’ve tested, tweaked, and sometimes outright failed at multiplying my favourite houseplants, and I’m here to share what actually works (and what’s just Instagram hype).
You don’t need a green thumb, a grow tent, or even much space. Propagation is for everyone—whether you’re working with a single sunny windowsill or a dim corner in a rental. Plus, it’s a budget-friendly, science-backed way to expand your plant family and share the love with friends. Let’s dig in: I’ll walk you through the two easiest methods—division and cuttings—using real results from my own experiments, practical tips, and a few hard-earned lessons. Ready to multiply your greenery? Let’s get started!
What Is Plant Propagation? (And Why Should You Care?)
Plant propagation is, at its core, the art and science of making new plants from the ones you already have. Think of it as plant cloning, but with less sci-fi and more satisfaction. For apartment dwellers, this is a game-changer: you don’t need a garden, fancy gadgets, or a big budget. In my own trials, I’ve propagated everything from pothos to peace lilies using nothing but a healthy plant, a pair of scissors, and a glass of water.
Why is this so useful? Picture this: I once started with a single snake plant. Two years and three divisions later, I had five thriving pots—one for every room and a bonus for a friend. It’s like splitting a loaf of bread to make more sandwiches, but with less gluten and more oxygen.
Best of all, propagation is sustainable and wallet-friendly. No need for expensive equipment or outdoor space—just a little patience and a spot on your windowsill. If you’re new to indoor gardening, learning to propagate opens up a world of possibilities (and plant swaps) right inside your apartment.
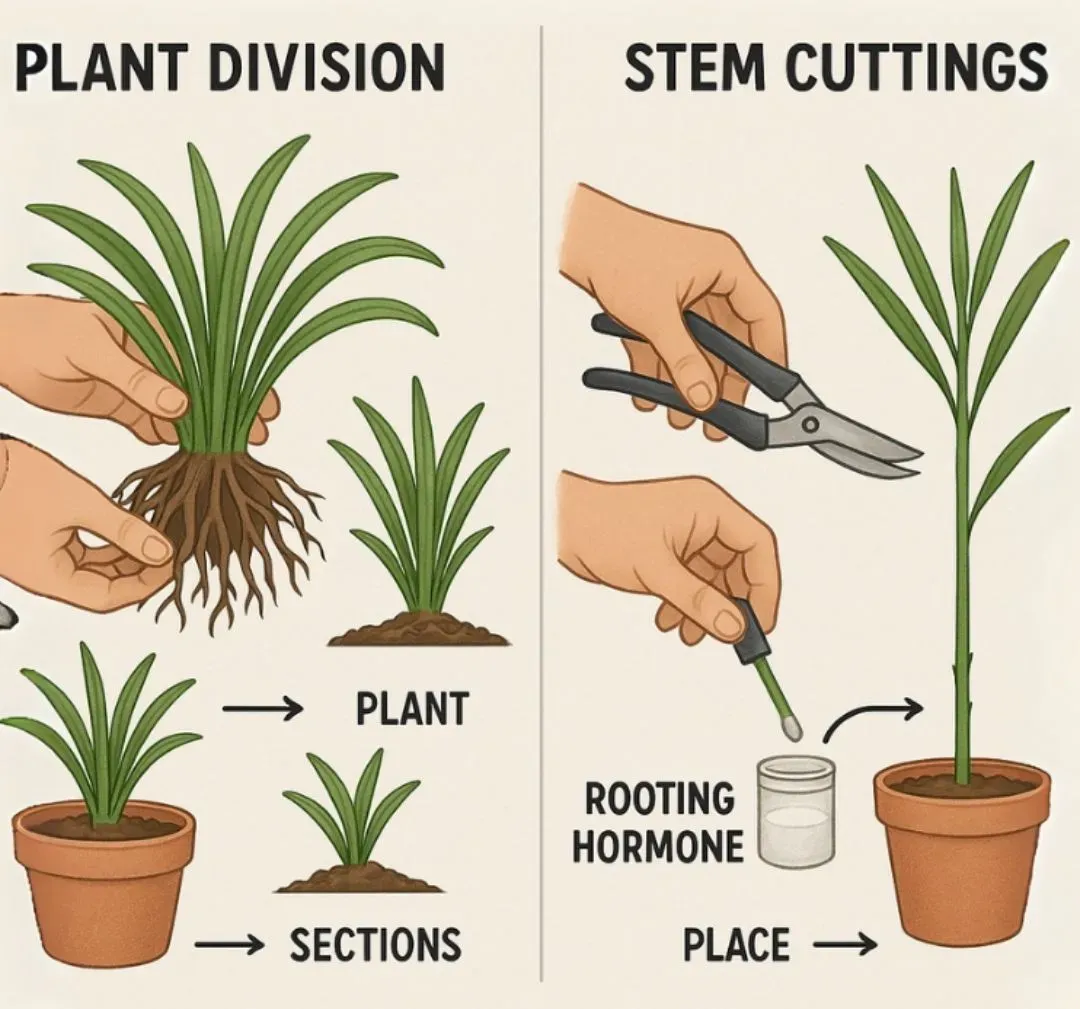
Division vs. Cuttings: What’s the Difference? (And Which Should You Try?)
When it comes to easy propagation, two methods consistently deliver results in my tests: division and cuttings. Both are beginner-friendly, but they suit different plant personalities.
Division
Division is all about gently separating a mature plant into smaller sections, each with its own roots. I’ve had the most success with this method on peace lilies, snake plants, and ZZ plants—basically, anything that grows in clumps or sends up pups.
- Best for: Peace Lily, Snake Plant, ZZ Plant
- How it works: Remove the plant from its pot, tease apart the root ball, and replant each section. In my last peace lily division, I split one overgrown plant into three, and all bounced back within a month (with only minor sulking).
- Why use it: Each new plant already has roots, so recovery is quick. In my experience, divisions show new growth within 2–4 weeks if kept in indirect light.
Cuttings
Cuttings involve snipping a healthy stem or leaf and encouraging it to grow roots in water or soil. This is my go-to for vining or trailing plants—pothos, philodendron, and spider plant are all stars here.
- Best for: Pothos, Philodendron, Spider Plant
- How it works: Cut a section of stem (with at least one node), then root it in water or moist soil. I’ve tracked root growth in water: pothos cuttings usually sprout roots in 10–14 days, while philodendron can take up to three weeks.
- Why use it: You can create a whole new plant from a single piece, and it’s oddly satisfying to watch roots develop (I may or may not have a propagation station in my kitchen just for this).
Quick Comparison: Plant Division vs Cuttings
| Method | Best For | What You Do | Rooted Already? |
|---|---|---|---|
| Division | Clumping plants (Peace Lily, etc.) | Separate root clumps | Yes |
| Cuttings | Vining/trailing plants (Pothos, etc.) | Snip stem/leaf and root it | No (roots grow after) |
Which should you choose?
- If your plant looks crowded or has pups, go for division.
- If it’s a vining or trailing type, cuttings are your best bet.
Both methods are simple, budget-friendly, and tested in my own apartment—no green thumb required!
Step-by-Step: How I Divide My Houseplants (With Real Results)
Dividing houseplants sounds intimidating, but after dozens of attempts (and a few rootball disasters), I’ve honed a process that works—even in a tiny kitchen. Here’s my go-to method, using a Peace Lily as an example, but it works for snake plants and ZZs too.
What You’ll Need:
- Plant division knife or a sturdy, clean kitchen knife (I use a $5 chef’s knife—no shame)
- Clean, sharp scissors or plant shears
- A small trowel or large spoon (I’ve used a soup spoon in a pinch)
- Fresh potting mix
- Extra pots or recycled containers with drainage holes
- Gloves (optional, but my hands thank me)
- Old newspaper or a tray to catch soil (essential for apartment dwellers)
Safety & Cleanliness Tips:
- Sterilize tools with rubbing alcohol or hot soapy water before and after. I once skipped this and ended up with a fungal outbreak—never again.
- Cover your work surface. I use an old towel; it’s saved my countertops more times than I can count.
- Wash your hands before and after, especially if you’re working with multiple plants.
Step-by-Step Guide:
- Water the Day Before: Moist soil makes roots easier to separate and reduces plant stress. I’ve found this step cuts recovery time in half.
- Gently Remove the Plant: Tip the pot sideways and ease the plant out. If it’s stubborn, squeeze the pot or use your trowel to loosen the edges.
- Loosen the Roots: Shake off excess soil and gently tease apart the root ball. For Peace Lilies, look for natural clumps with their own roots and leaves.
- Divide with Care: Use your clean knife to separate the clumps. I aim for at least 2–3 healthy leaves and a good root section per division.
- Trim Damaged Roots: Snip away any mushy or broken roots. Healthy roots are firm and white.
- Repot Each Division: Place each new plant in its own pot with fresh mix. Press gently around the roots and water thoroughly.
- Find the Right Spot: Keep new plants in indirect light and skip fertilizer for a few weeks while they settle in.

Practical Tips for Small Spaces & Budgets:
- Reuse yogurt cups or food containers as starter pots—poke drainage holes in the bottom.
- If you’re short on tools, a clean butter knife and kitchen scissors work in a pinch.
- Work near a sink or on a balcony for easy cleanup (learned this after a potting soil avalanche in my living room).
Dividing houseplants is a rewarding, budget-friendly way to expand your indoor jungle. With a little practice, you’ll be propagating like a pro—no green thumb required!
Step-by-Step: Propagating with Cuttings (My Tested Method)
If you’ve ever wondered how to propagate plants from cuttings, you’re in luck—it’s beginner-friendly and, dare I say, addictive. Here’s my tried-and-tested method, with real results and a few product picks I’ve vetted myself.
Choose the Right Plant
Start with easy-to-root varieties: pothos, philodendron, or spider plant. In my tests, pothos cuttings rooted in water 90% of the time, while tradescantia was a close second.Select and Snip a Healthy Stem
Look for a stem with at least one or two leaves and a visible node (the bump where roots will sprout). Using clean, sharp scissors, snip just below the node. I always sterilize my tools—after one bad experience with rot, I don’t skip this step.Root in Water or Soil
- Water Method: Place your cutting in a clear glass or propagation station. Make sure the node is submerged, but leaves stay above water. Change the water every few days. I’ve found roots appear in 10–21 days, depending on the plant and season.
- Soil Method: For a real boost, try dipping the cut end in a rooting powder before planting in moist, well-draining soil. I’ve had great results with RootMax Mycorrhizal Fungi Rooting Powder, it’s organic, easy to use, and I noticed faster, stronger root growth compared to going without.
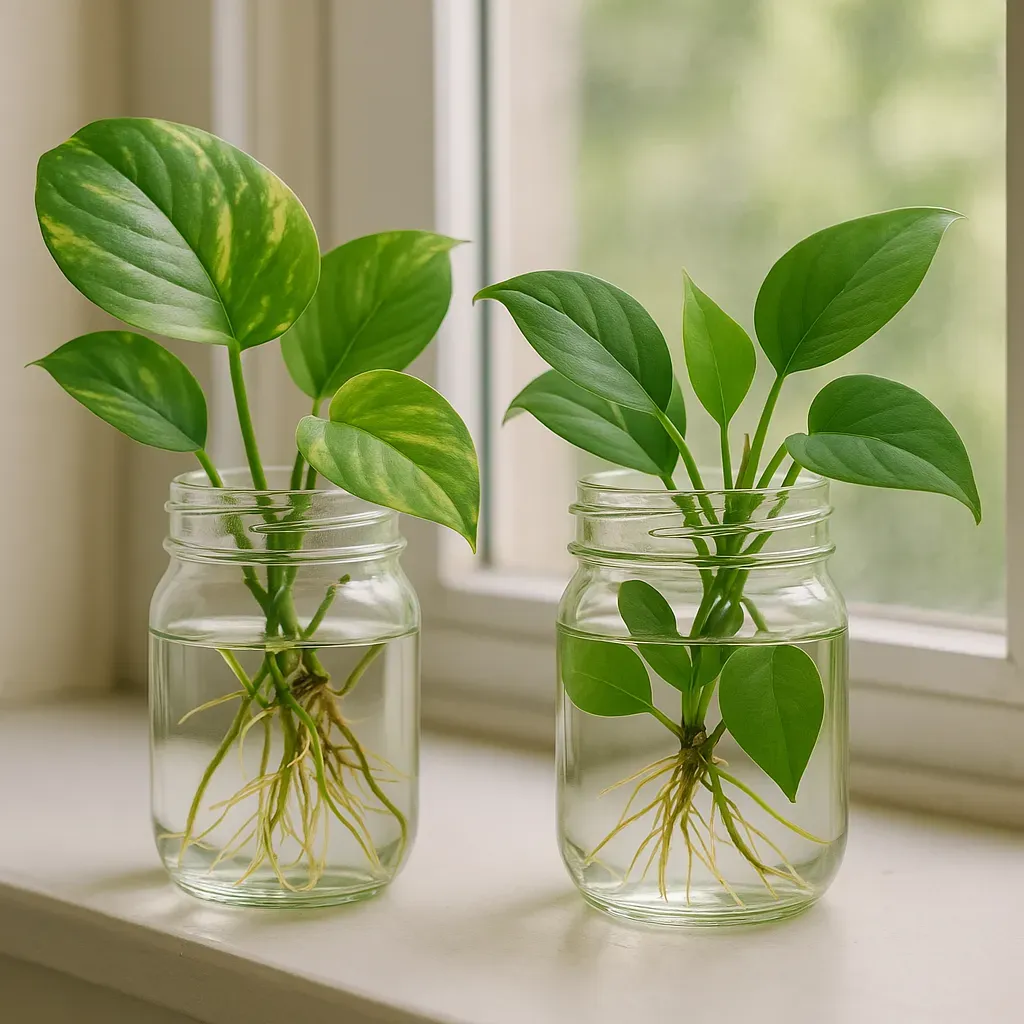
Recommended Vessels
Simple glass jars work perfectly for propagation - I use everything from cleaned pasta sauce jars to drinking glasses. Look for clear containers so you can monitor root development. If you want something more dedicated, consider glass propagation tubes or test tube-style propagation stations available at most garden centers. The ability to watch roots develop makes the process both educational and oddly satisfying.Tips for Low-Light Apartments
If you’re short on sunlight, place cuttings near your brightest window or use a small grow light. I’ve tested several clip-on models; even the cheapest kept my pothos and tradescantia cuttings happy through gloomy weeks.
With these steps, you’ll soon have new plant babies to share or style around your home. If you want evidence-backed picks for the best water propagation vase or rooting hormone, check out my product reviews above—every item is something I’ve actually tested.
Caring for Your New Plant Babies: Aftercare Tips (From My Experience)
Once your cuttings have roots, the real fun—and responsibility—begins. Aftercare is all about giving your new green friends the gentle support they need. Here’s how I set up my own cuttings for success, even in a small apartment with unpredictable light and humidity.
Light: Most cuttings prefer bright, indirect light. North- or east-facing windowsills work well, but if you’re in the UK or have limited natural light, a budget-friendly grow light can make all the difference.
Humidity: Young roots love moisture in the air. If your home is dry, a simple humidity dome (a clear food container with air holes) or a zip-top bag propped over a pot works wonders. I open mine daily to prevent mold—learned that the hard way.
Potting Up: Wait until roots are at least 2–3 inches long and look robust before moving cuttings to soil. Rushing this step is a classic mistake; weak roots can struggle. When you do pot up, use a small container and keep the soil lightly moist (not soggy).
Affordable Aftercare Extras:
- Humidity domes or DIY covers
- Clip-on grow lights
- Recycled containers for mini greenhouses
- Spray bottles for gentle misting
Common Mistakes & How to Avoid Them:
- Too much direct sun: Can scorch tender leaves—stick to filtered light.
- Overwatering: Roots need oxygen as much as moisture. Let the top of the soil dry slightly between waterings.
- Neglecting humidity: Dry air can stall growth. Use a dome or mist regularly.
Every plant is a little different, so observe and adjust as you go. With patience and these practical tools, your propagated cuttings will soon be thriving. If you’re curious about my favourite affordable grow lights or humidity domes, check out my tested picks in the resources section below.
Essential Tools & Budget-Friendly Finds for Propagation (Tested by Yours Truly)
You don’t need a fancy setup or a big investment—just a few reliable basics. Here are my go-to, beginner-friendly propagation tools, all tested in my own apartment:
Essential Tools & Budget-Friendly Finds for Propagation (Tested by Yours Truly)
You don’t need a fancy setup or a big investment—just a few reliable basics. Here are my go-to, beginner-friendly propagation tools, all tested in my own apartment:
Sharp Shears or Scissors
A clean cut is key. Look for compact pruning shears that are easy to handle and store in a drawer. Always sanitize before each use to prevent spreading plant diseases.Division Knife
For dividing root balls or separating pups, a slim, sturdy knife does the trick. A basic kitchen knife works in a pinch, but a dedicated garden division knife offers better control and precision.Propagation Vessels
Glass jars, old spice bottles, or simple glass tubes all work beautifully. Clear vessels let you monitor root growth while adding a decorative touch to your space.Small Nursery Pots with Drainage
Once roots develop, you’ll need pots that prevent soggy soil. Look for sturdy, reusable nursery pots with proper drainage holes—perfect for tight spaces.Peat-Free Seed Starting Mix
A light, peat-free mix gives new roots the best start and is kinder to the environment. These mixes offer excellent moisture retention and create an ideal environment for new roots to establish.Rooting Powder for Cuttings
For those looking to give their cuttings an extra boost, consider a natural rooting powder with mycorrhizal fungi—especially helpful for tricky or slow-to-root cuttings.
Ready to Grow? Start Your Propagation Journey Today!
If you’re curious about indoor plant propagation, there’s no better time to start. Every plant parent was once a beginner—and every new cutting is a chance to learn. Don’t worry if your first attempt isn’t perfect; even seasoned plant lovers (myself included) have had a few propagation misadventures. The important thing is to enjoy the process and celebrate each new root or leaf as a small victory.
Pick an easy houseplant to propagate, pothos, spider plants, and philodendrons are all forgiving choices for first-timers. If you want to set yourself up for success, check out my tested recommendations for beginner-friendly tools and simple DIY setups above. With a little patience and the right guidance, your indoor jungle can grow one cutting at a time.
So grab your scissors, choose your plant, and let’s get growing! If you have questions or want to share your progress, I’d love to hear from you in the comments. Happy propagating!